It seems like only yesterday I was roasting a Tofurkey for Canadian Thanksgiving, eating squash, and getting all knee deep in pumpkin and everything spiced. That time has passed, and I'm now onto bigger and better things like chocolate, eggnog, gingerbread houses, and Santa. am I right?
Last Saturday we went to Brent's holiday work party. The theme was Mad Men (yay!!!), which is perfect because I always wanted to attend a Mad Men themed party, and although I have very little desire to have lived during the 60's, I was very very excited to dress the part for a night. After searching for many days for a period-themed dress, I found this $450 dress for $60 at the Goodwill down the street. I found a few additional pieces - some chunky pearls, a gold purse, styled my hair in a big up-do, and finished off the look with some red lipstick. I tried as hard as possible to be in full character, obvs. leading to me drinking way too much champagne. When the party was over, despite my state, I did manage to leave with coat and purse in tow, which in my opinion, the biggest success of the evening.
Most people who attended were in costume, which was a big relief because you really don't want to be that person who took the whole costume thing way too serious. The venue was at the Pacific Science Center, which was pretty convenient for those awkward moments when you run out of things to say to your husband's co-workers. There was food, and games, a few sciency shows (combustion, space, etc) but none quite as exciting as being in the butterfly conservatory - too many drinks into the night. Nothing says awesome like a few butterflies landing on your head, your depth perception and reflexes too slow to realize the shear panic you would be feeling by now if you were sober.
Throughout the night, 1960's-inspired food and snacks (meat sandwiches, pickled vegetables, and oysters) were served, and besides the chocolate covered strawberries and personal snack size servings of Ruffles chips with sour cream and onion dip, the rest of the food should have been left back in the 60's. What they really should have done was recreated that avocado, salsa, and sour cream omelet, potatoes, toast, grapefruit juice brunch I ate the next morning

The next day was a total write-off. I managed to walk the short 3 block radius from my house, out for brunch, back to my house, and to the couch, where I spent the rest of the day watching my friend make these pretty red, green, and white tricolor Italian rainbow cookies. I was really impressed with her commitment and dedication to the art of Christmas baking. It got me thinking about this Christmas, and what sort of treats I want to make this year. Last year I took my first attempt at making boozy fruitcake and candied orange sugar cookies. I wrapped up the leftover candied orange peel in cellophane wrap and handed them to family as gifts. It was such a success I wanted to do something similar this year.
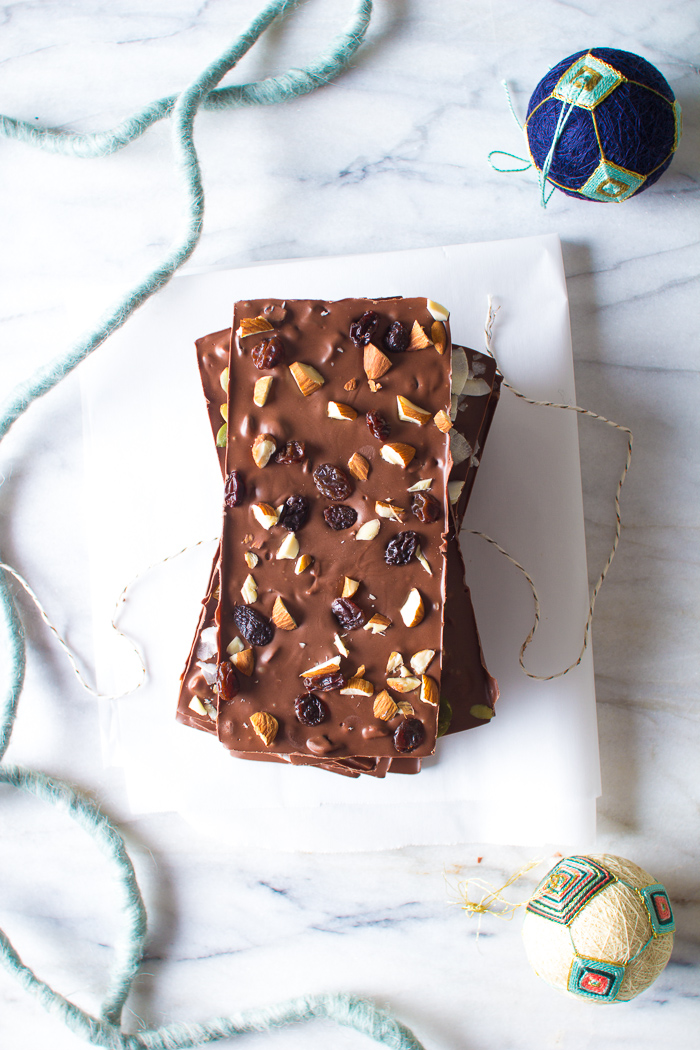
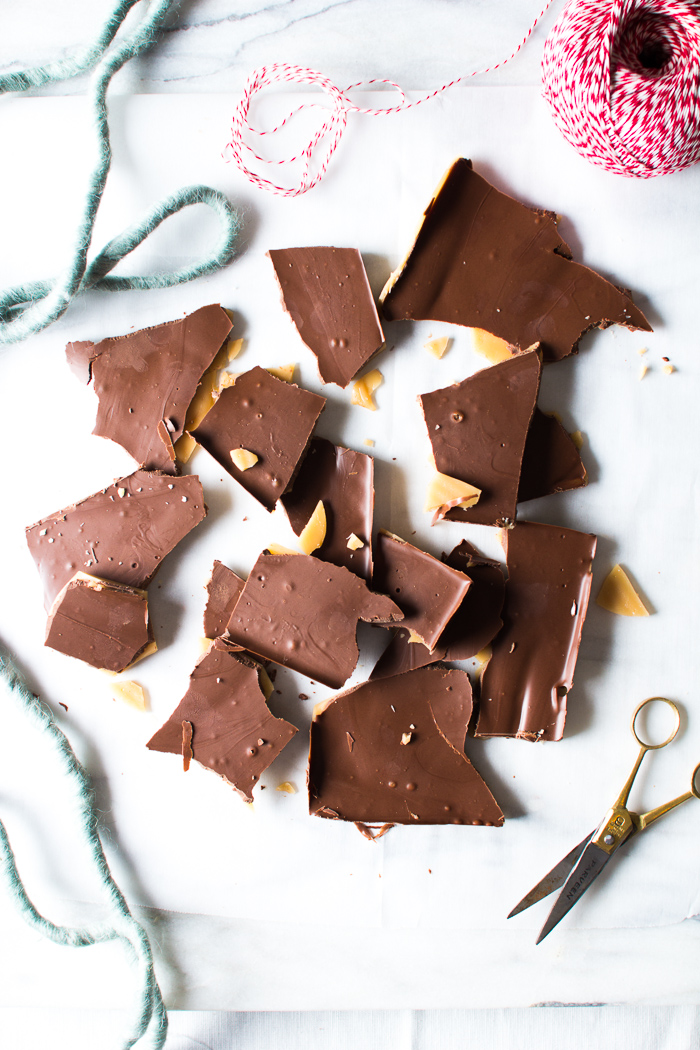
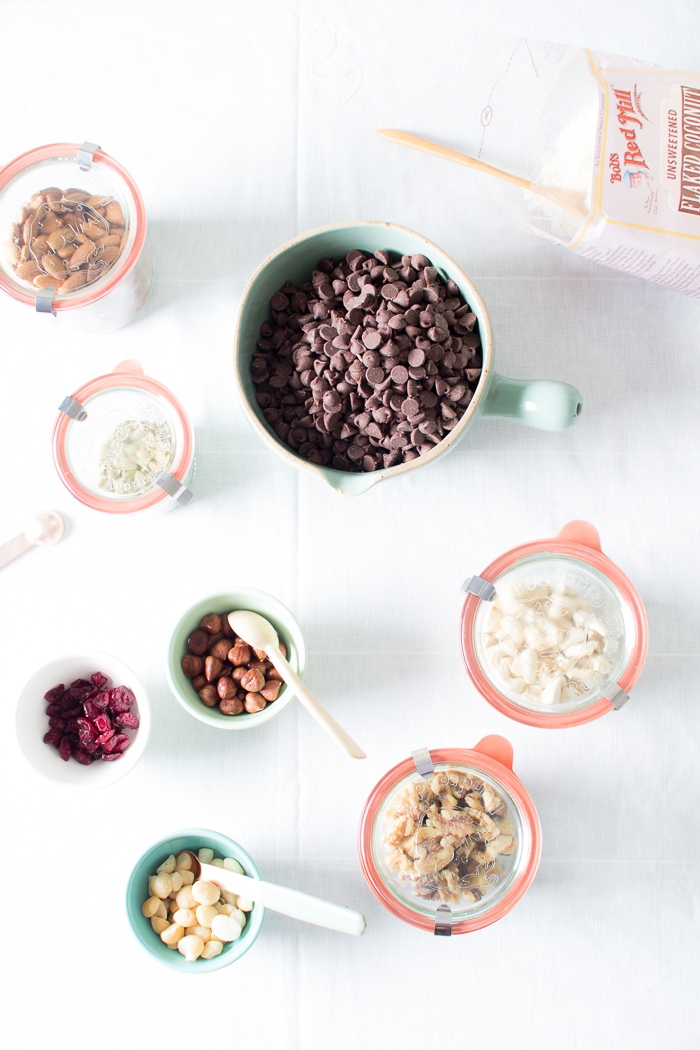
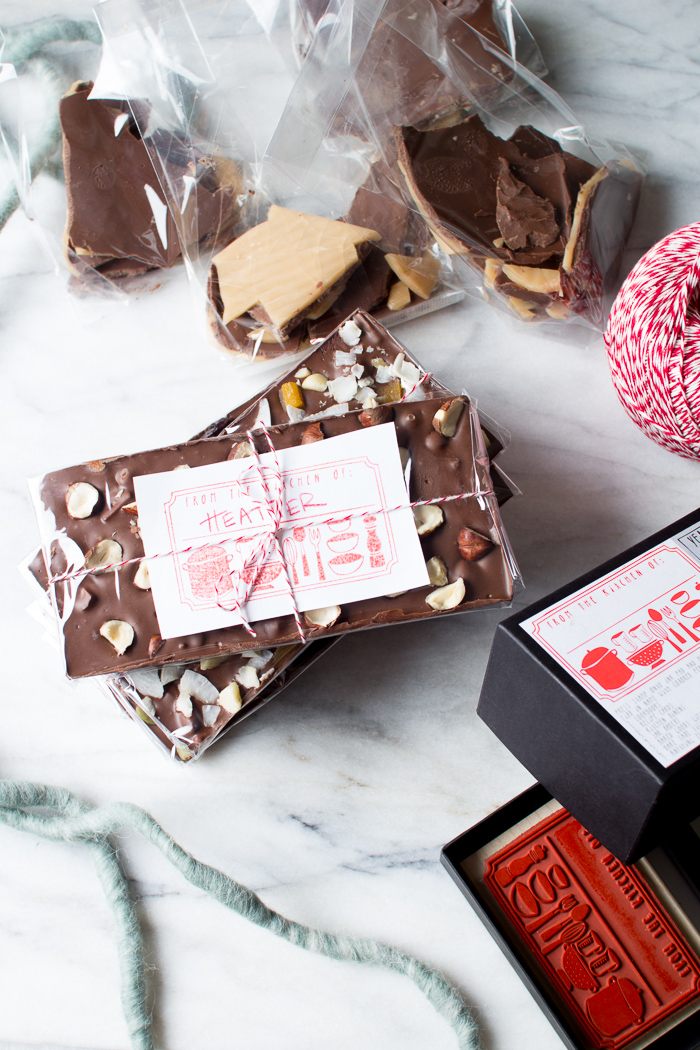
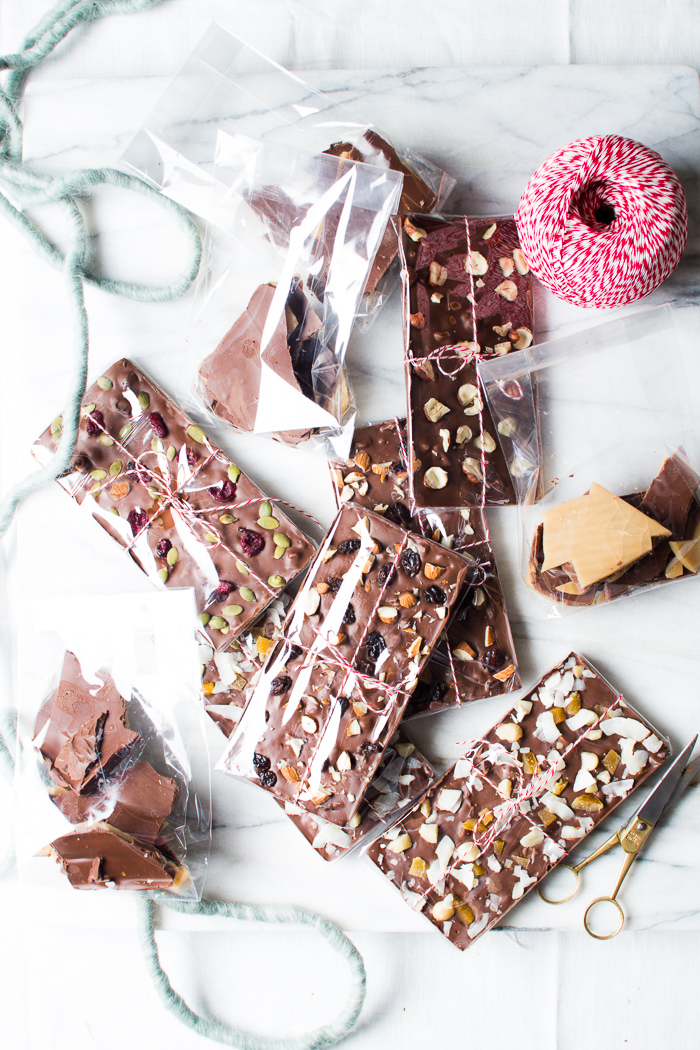
I decided on making homemade fruit and nut chocolate bars, and some homemade Skor bars, and am going to try to not eat them all by the holidays, especially the Skor bars which are out-of-this-world. I went to the store and picked up some 45% milk chocolate, because let's be real, ima milk chocolate girl, but you could always use dark or white chocolate if you prefer. I have seen some people swirl the white chocolate into the dark and it looks really fancy. Something to impress your friends. I also picked up a selection of nuts and dried fruit from bulk bins, and a tub of fresh ground almond butter for later. I came up with a few combinations for chocolate bars that I wanted to try: raisin + almond, mango + macadamia + coconut, cranberry + pumpkin seed, and let me tell you, the raisin and almond did not disappoint. The hard part, now I have to decide who to give them to. I do know however that the Skor bars are mostly for Brent. And me. Mostly me, who am I kidding?

FRUIT AND NUT CHOCOLATE BARS
makes 6 bars
4 cups milk or dark chocolate chips
variety of dried fruit (mango, cranberries, raisins)
variety of nuts (macadamia nuts, hazelnuts, almonds, pumpkin seeds)
dried coconut flakes
cellophane wrap
tape
string
labels
To make rectangular chocolate bars, you will need to use a small rectangular loaf pan as your mold, preferably 6 x 3 inches, or something similar in size - roughly the size of a large chocolate bar. Alternatively, you could purchase a chocolate bar mold.
Before you begin melting the chocolate, decide on some different nut and fruit combinations for your bars. I chose 1) raisins + almonds 2) mango + macadamia nuts + coconut 3) cranberries + pumpkin seeds + hazelnuts 4) hazelnuts. Chop the nuts and fruit, and set aside.
If you're using a loaf pan as a mold, line the bottom with parchment paper. If the parchment paper isn't sticking to the pan, place two small dabs of chocolate underneath to act as a glue.
Melt the chocolate in a double boiler, or a make-shift double boiler (glass bowl over simmering water, but not touching) until it reaches between 115 and 120°F. Remove the chocolate from the heat. At this stage, you want to reduce the chocolate temperature to 81ºF. To do this, pour the chocolate onto a cool surface (marble or granite counter) and scrape it back and forth with a pastry scraper. Once it reaches 81ºF, pour the chocolate back into the double boiler and heat until it's between 88 - 90Fº. Try to keep the chocolate between 88 - 90ºF while stirring with a whisk for 5 minutes. This may mean that you need to remove the chocolate from the double boiler and then place it back when you need to increase the heat. To test if the chocolate has tempered, dip a knife into the chocolate and then place it into the fridge for about three minutes. If it comes out soft or it melts to the touch, it hasn't tempered correctly and you need to repeat the process. If the chocolate is streaky and semi-firm you will need to whisk a bit longer. The chocolate has tempered properly when it comes out hard and snaps.
Pour the chocolate into the molds and arrange the fruit/nuts on top of the bar.
Place the pan into the freezer to chill the chocolate for 5 minutes. Tap the pan on the counter a few times to loosen the bar, or run a knife around the edges. Wrap with cellophane wrap. Decorate with string, and place a label on top describing the ingredients.
HOMEMADE SKOR BARS
makes 1 - 9 x 9-inch pan
1/2 cup unsalted butter
1/2 cup granulated sugar
1/4 tsp kosher salt
2 tbsp water
2 cups milk or dark chocolate chips
cellophane wrap
tape
string
labels
To make the toffee, place the butter, sugar, salt, and water into a medium saucepan. On medium heat, bring to a boil. Continue to cook until the sugar has reached 300ºF, stirring constantly. Once the caramel has reached 300ºF, pour it into a square baking dish, and quickly tip from side to side spreading the toffee around. It will begin to harden immediately, so it is important to move fast. Place the pan in the fridge to continue hardening.
Melt the chocolate in a double boiler, or a make-shift double boiler (glass bowl over simmering water, but not touching) until it reaches between 115 and 120°F. Remove the chocolate from the heat. At this stage, you want to reduce the chocolate temperature to 81ºF. To do this, pour the chocolate onto a cool surface (marble or granite counter) and scrape it back and forth with a pastry scraper. Once it reaches 81ºF, pour the chocolate back into the double boiler and heat until it's between 88 - 90Fº. Try to keep the chocolate between 88 - 90ºF while stirring with a whisk for 5 minutes. This may mean that you need to remove the chocolate from the double boiler and then place it back when you need to increase the heat. To test if the chocolate has tempered, dip a knife into the chocolate and then place it into the fridge for about three minutes. If it comes out soft or it melts to the touch, it hasn't tempered correctly and you need to repeat the process. If the chocolate is streaky and semi-firm you will need to whisk a bit longer. The chocolate has tempered properly when it comes out hard and snaps.
Remove the toffee from the fridge. Pour the chocolate over the toffee. Tip the pan back and forth to help evenly distribute the chocolate. Let it harden in the fridge. Once hardened, break the chocolate toffee into small pieces. Place into tiny cellophane bags, tie with string, and label.