Last week Deb from Smitten Kitchen posted a picture of these black and white cookies which reminded me that I've always wanted to make them. Soft lemony pillowy cake-like cookies with vanilla and chocolate frosting on top.
Carrot cake is a quintessential dessert of spring. This recipe is moist slightly sweet, and perfectly spiced. It is paired with a rich and velvety cream cheese frosting.
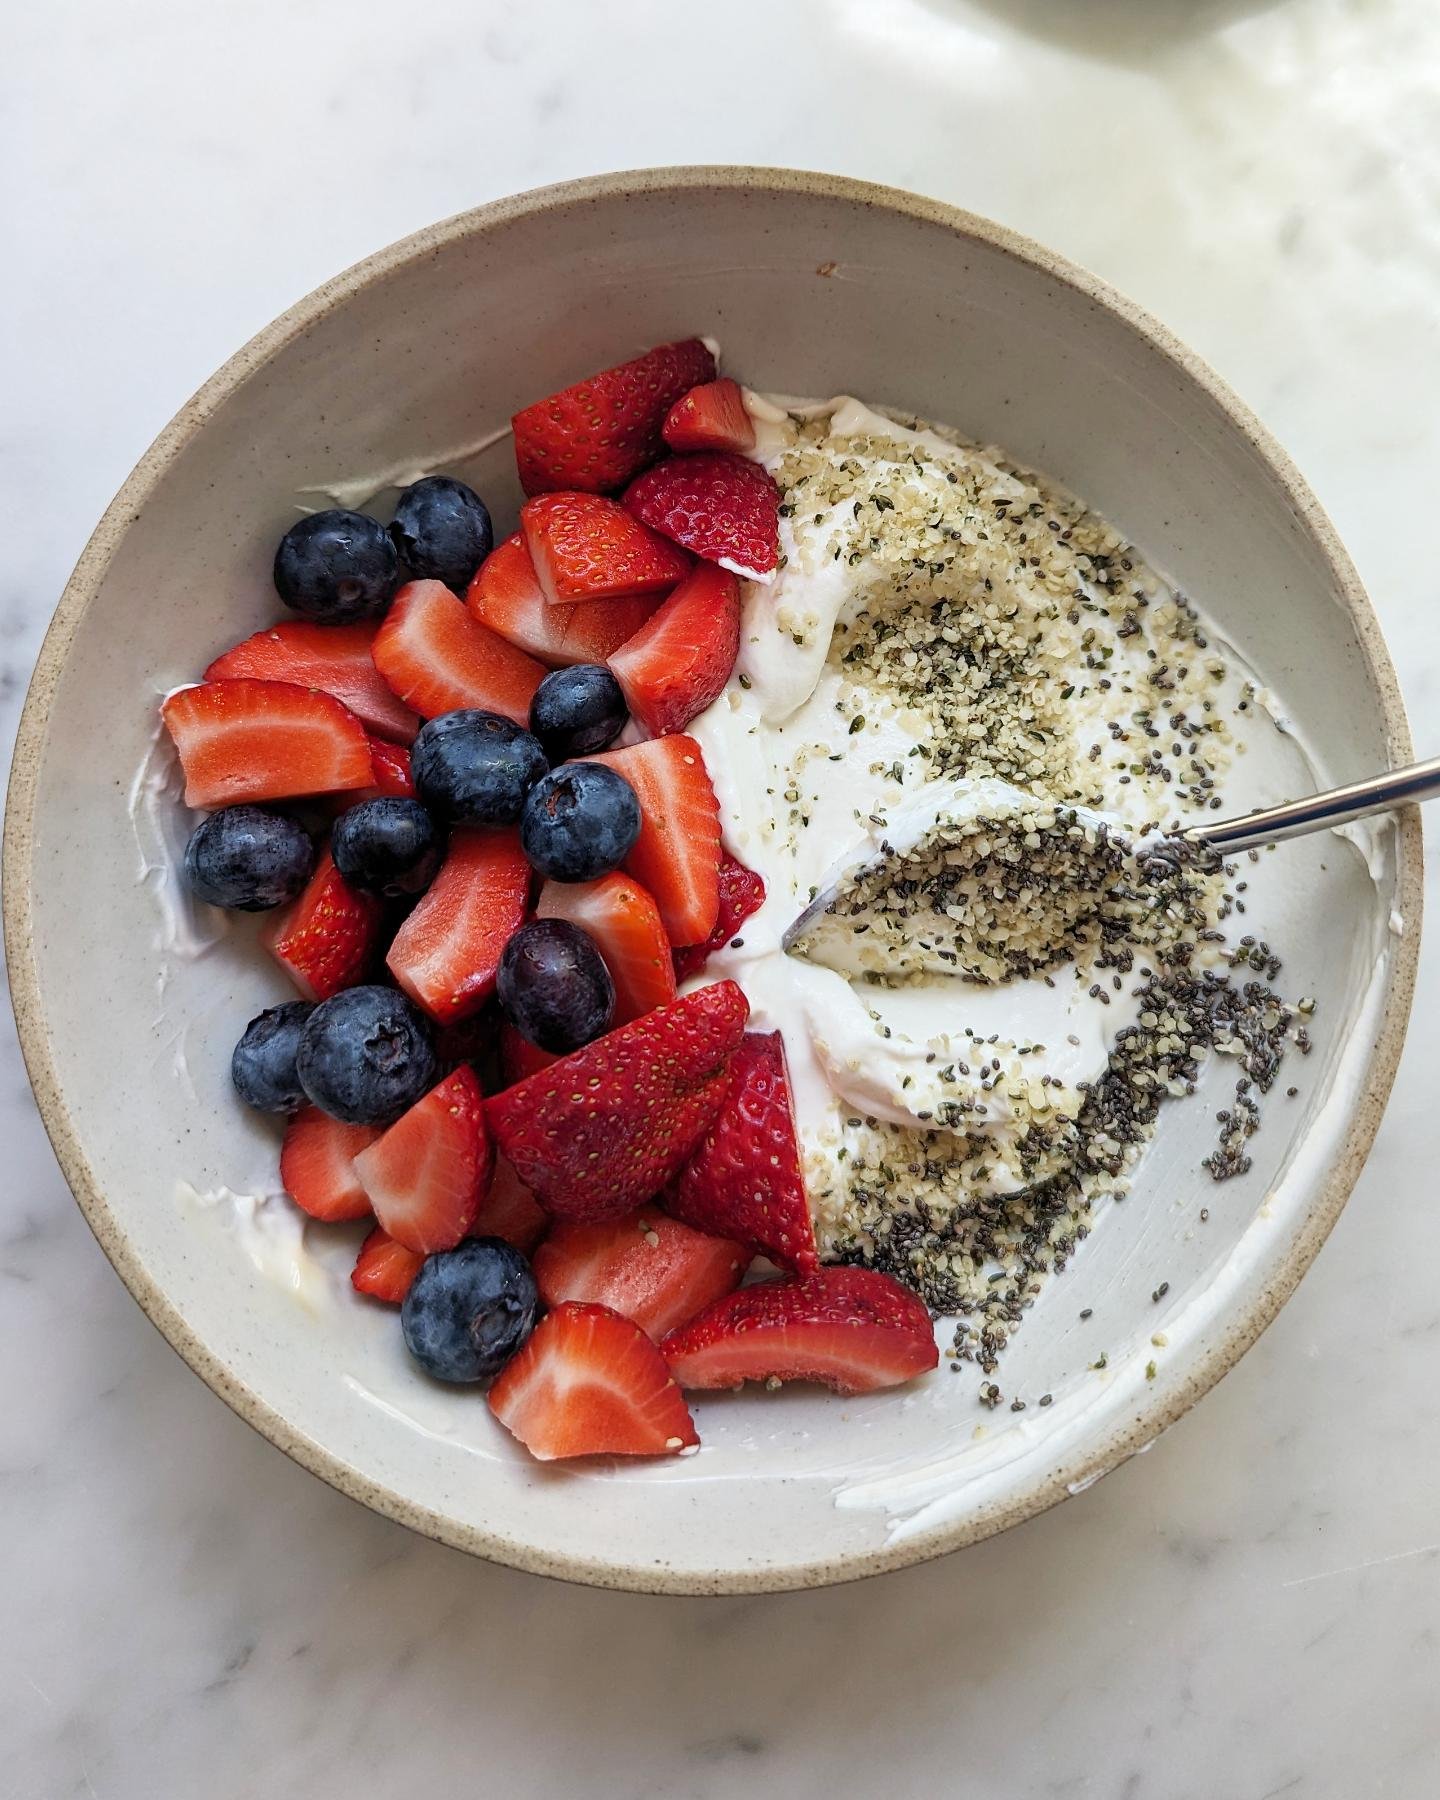
Asparagus is so beautiful this time of year, so I wanted to create a recipe around it. I made some basil and pumpkin seed pesto, and drizzled it on toasted bread with asparagus, avocado, and shaved Parmesan.
Because his family is a true-to-the-bone pancake family, I really wanted him to share with me the secrets to making a good pancake, thin and delicate, perfectly browned on the outside, soft on the inside. He gave me a recipe, one that he has memorized. A set of very specific instructions, the right temp, the right amount of time for frying. I followed it to a tee, and sure enough, the pancakes came out the way I had always dreamed they would.
Last week Deb from Smitten Kitchen posted a picture of these black and white cookies which reminded me that I've always wanted to make them. Soft lemony pillowy cake-like cookies with vanilla and chocolate frosting on top.
A lot of my friends have been asking for kitchen/food-related gift ideas this year, so I thought it'd be fun to share a holiday gift guide. A few of these items I have already purchased for other people, a few of them I am hoping Santa puts under the tree, and the rest I own myself and absolutely adore.
These caramels!!! Now, I'm not going to take the claim to fame for inventing this caramel recipe, because it is a very slight adaptation from Ina Garten's fleur de sel caramel recipe, but I did come up with the idea to cover them in dark chocolate and top with some flaked sea salt, and that's got to mean something.
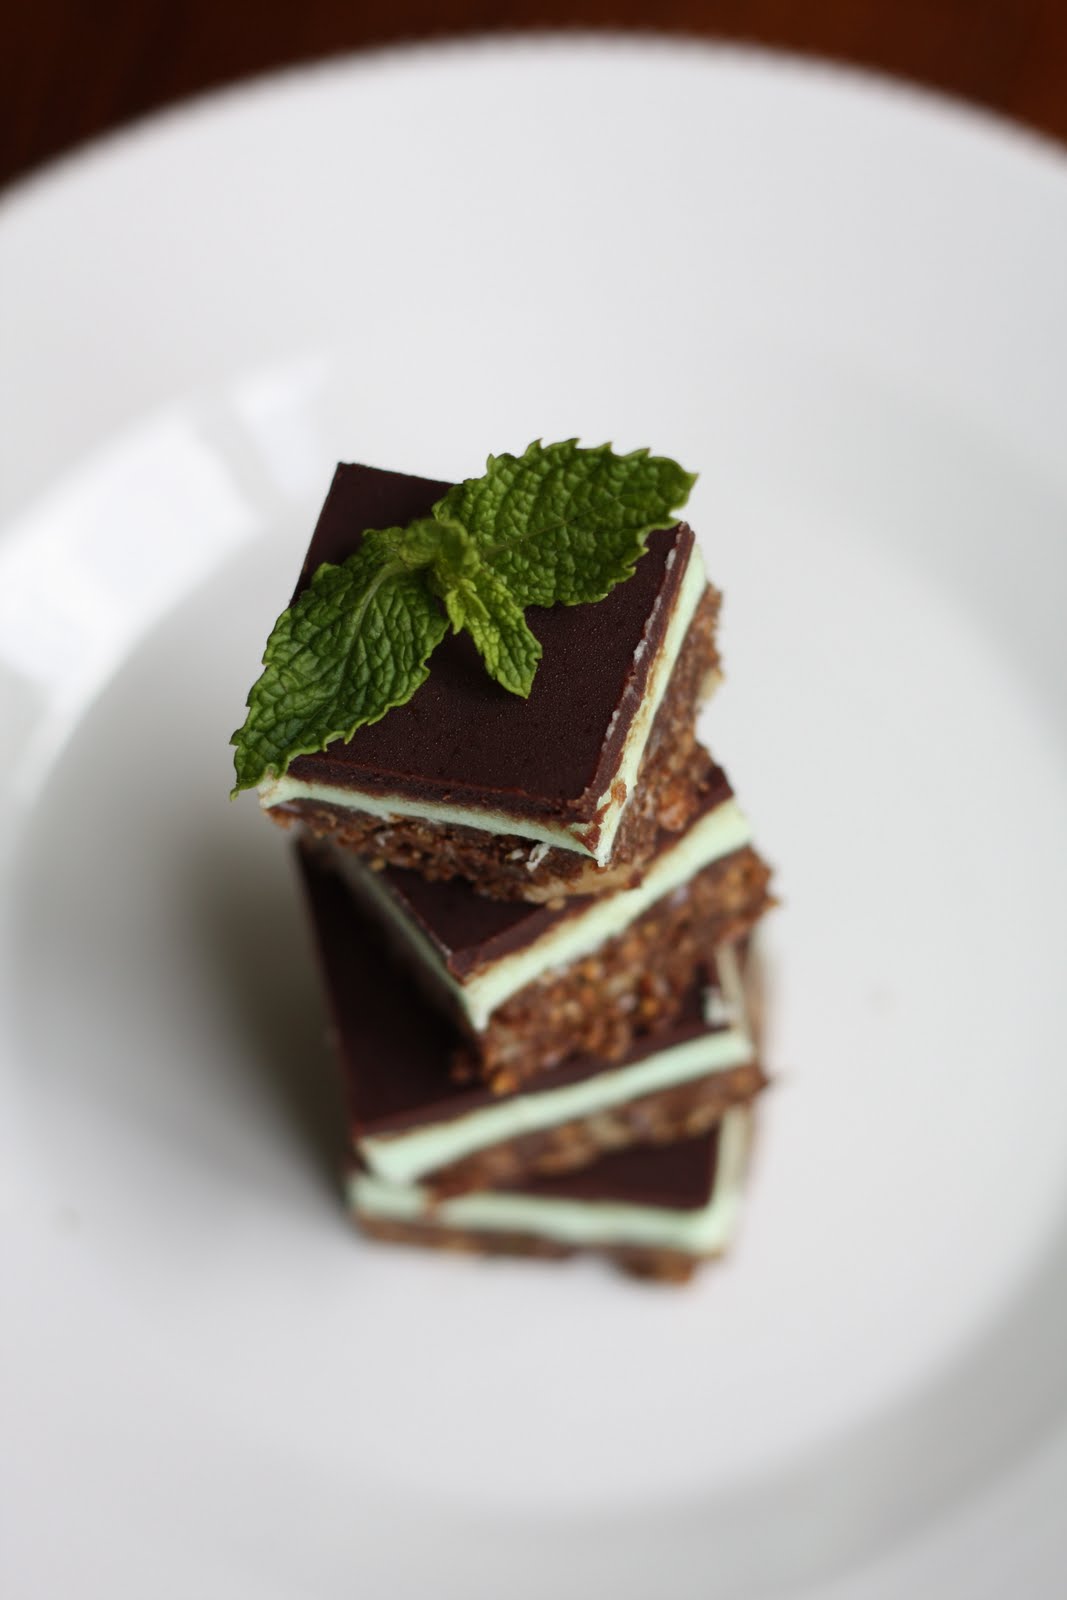
I am just going to leave you with a roundup of my favorite Holiday cookies and slip away quietly. If you choose to make only one cookie recipe this year (because you have way more exciting things to do than spend hours in the kitchen baking - I love you and envy you), the mint chocolate Nanaimo bars are perfect.
I love mulled wine this time of year. It feels like the grown-up version of hot chocolate, although I've seen some pretty good looking baileys hot chocolate recipes on Pinterest. There's something so soothing about a simmering pot of mulled wine on the stove, the smell of cinnamon and cloves - it warms my heart.
Instead of having glitter adhered to my fingers and hair, and two feet stuck in the middle of a giant glitter party, I've got tiny shreds of candy cane stuck to the bottom of my slippers causing my to feet to cling to the floor when I walk. The dog has random bits of candy cane stuck to his fur, and he doesn't even know it. In the same manner, candy lies snug in the cracks and grooves of the table, stuck for another year or two until it becomes a permanent part of the structure.
I mention glitter, because in the past I have painfully attempted to make the following, a) glittered Christmas ornaments, b) sparkly martini's (with edible glitter, of course), and c) sparkly cookies. As we speak, pinterest is turning into a giant(!)
, and I suspect that I won't be the only one feeling mildly skeptical about it this year.
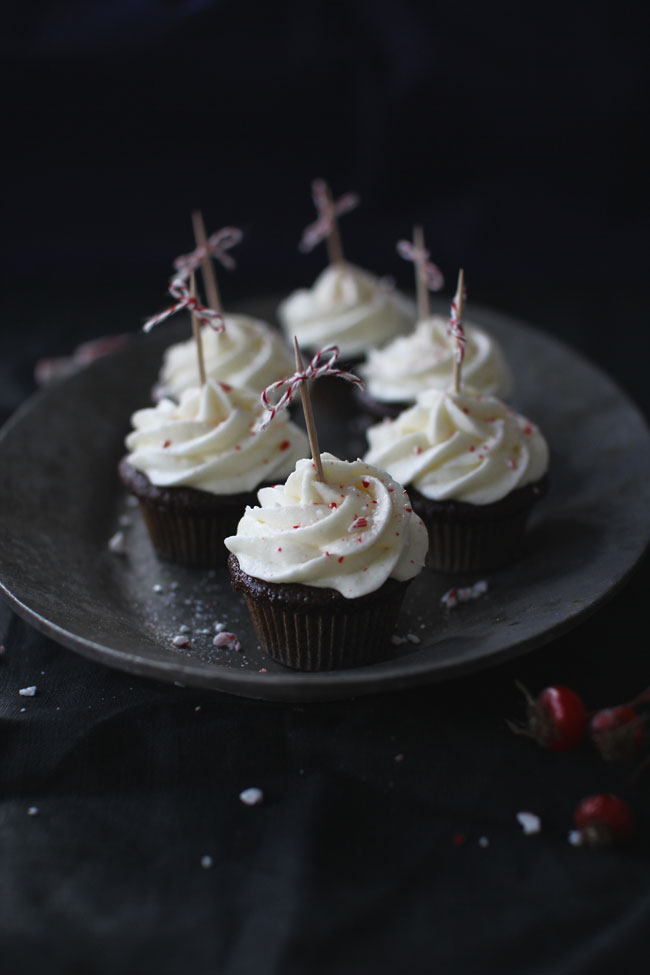
Glitter and crushed candy cane are similar in that they are delightful to look at until you get them all over the floor, and then they stick to everything, and you're never quite able to fully erase their existence from your home. I was doing pretty good this year, until I started to set up today's photo shoot. I'm a pretty messy photographer/cook/baker/stylist to begin with. Dishes piled all over the kitchen, fabric, wood boards, and food props scattered throughout the house. You can usually catch me standing on the table, balancing carefully, trying not to break my neck or step in a hot bowl of soup. I have white boards balanced on vases, and white sheets pinned to the venetian blinds - which are probably doing them no good. So it's no surprise that, when I started sprinkling candy cane, I missed the cupcakes and hit the dog and floor instead.
You're probably wondering what my dog was doing underneath the photo shoot, and I often wonder that myself. Cleaning up was an event in itself! I gave up half way through, partly due to boredom and partly due to annoyance, and then went shopping instead. So it's decided that I am now sticking to online shopping during the holidays and avoiding recipes that involve tiny bits of sticky candy. I'm placing them in the glitter pile, a pile that should be swept away somewhere out of reach. It's much safer that way.
It took me a few days to come up with a recipe for my first holiday post. I tossed and turned on a few ideas. Cookies, cakes, and squares were all contenders, but I am a natural born lover of cupcakes, so putting a festive(!) twist on an already delicious dessert only seemed fair. After all, everyone could use a little more cupcake in their life - which isn't to say that I don't have a few cookie recipes up my sleeve and a Christmas cake also in the works. With all of the holiday baking in the next few weeks, and a household of 2.5, I have managed to pawn off at least 3/4 of what I've baked, which puts me a few steps ahead of the game. Without a doubt, if it's sweet, delicious and in the house, I will eat it!!! Except for the rest of the Pot of Gold. I am so over it.
I used one of my favorite cupcake recipes from a local cupcake shop here in Seattle -
. (if you're ever in Seattle you need to try!!) I found it on the
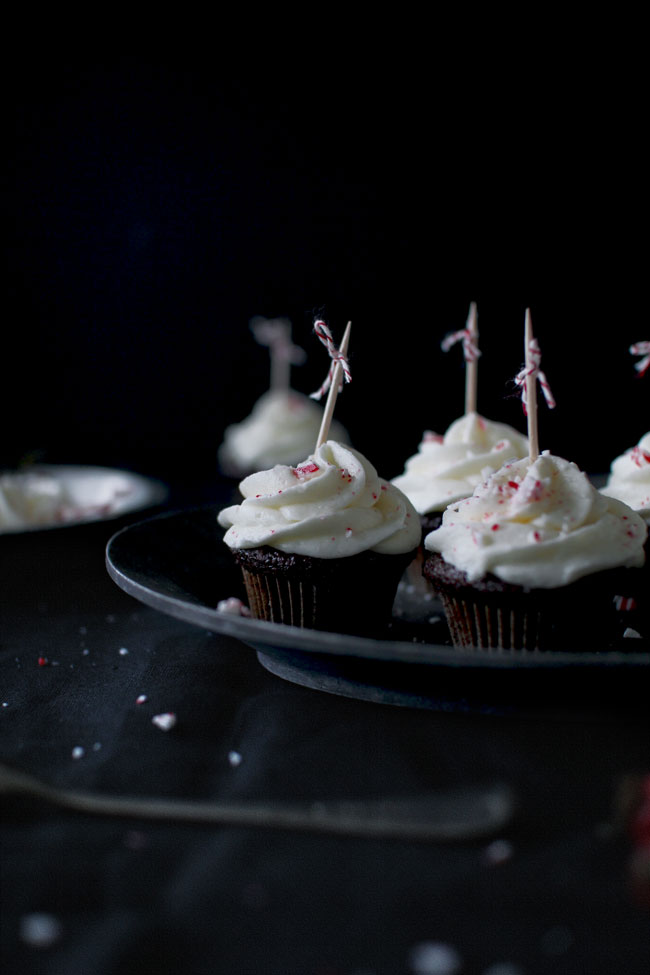
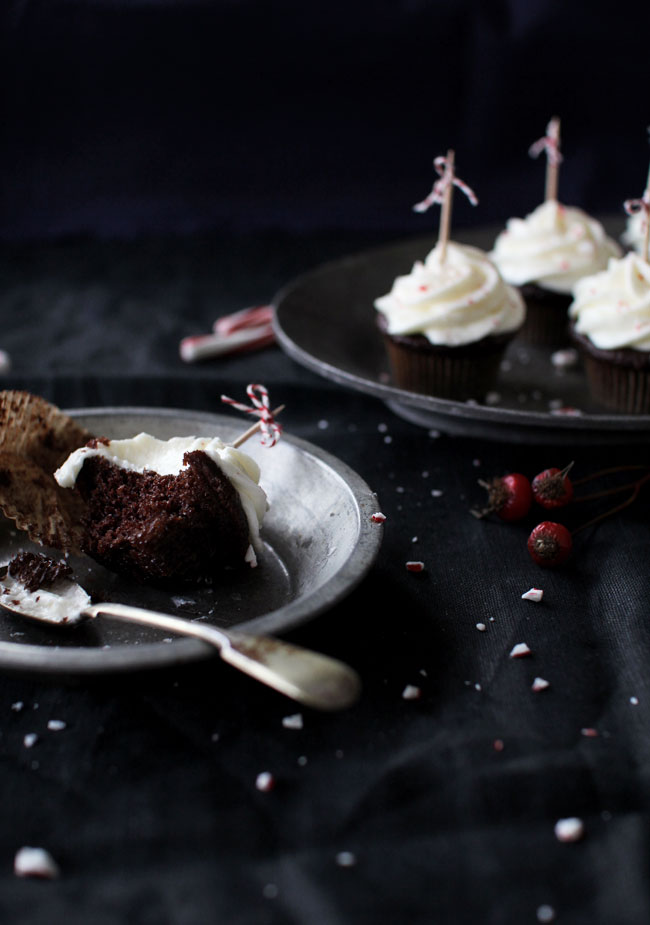
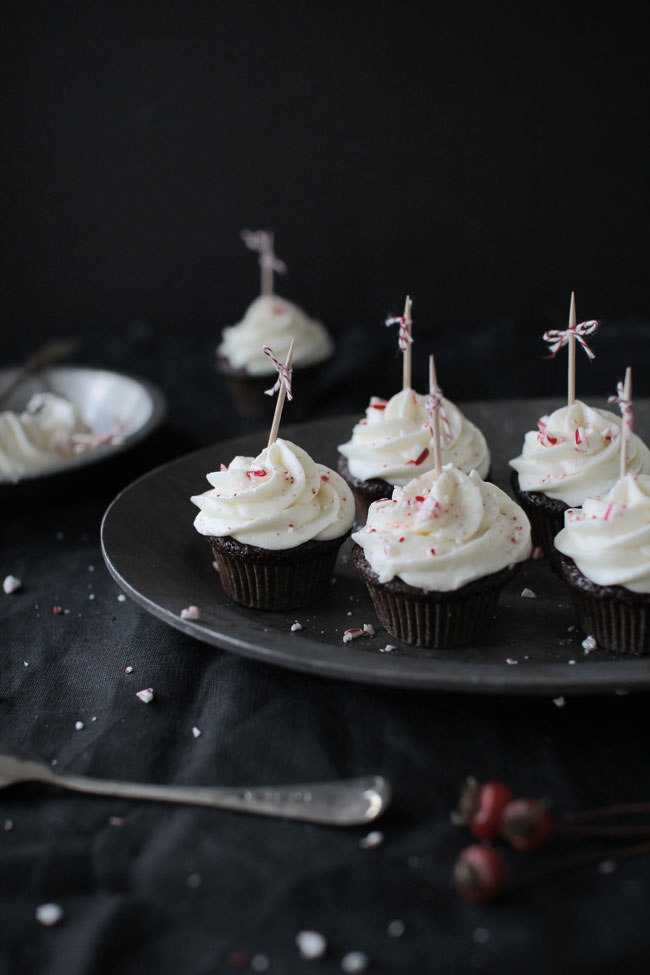
a while back, and it pleased-me-to-no-end knowing that I could make them at home. This recipe calls for standard cupcake ingredients - flour, cocoa, baking soda, baking powder, etc. Mixing the wet and then mixing the dry, combing them together, and then adding a 1/2 cup boiling water. This can all be completed in under 10 minutes with a couple of bowls, measuring cups, and a wire whisk. The batter is quite thin, thus using a liquid measuring cup to pour the batter into the cups will prevent a mess.
It is handy to fill the cups 3/4 full, or the batter will bake over the edges. This is a purely aesthetic and not practical, so if you end up going over, no bigs - that just means a little more cupcake with each bite. After baking, the cupcakes have a light and airy texture, so pairing them with a light and airy frosting seemed reasonable. Still a bit terrified of raw egg whites, I steered away from the Swiss and Italian buttercream and stuck with my old standard buttercream - butter, icing sugar, and milk. I added a tsp of peppermint extract, and sprinkled candy cane on top - which we are all pretty aware of by now. After sitting overnight, the candy cane lost it's crunchy-ness and melted into the frosting, so sprinkling before serving is probably a better idea.
If you've been around here for a while, you're likely familiar with my love for tiny foods. Granted, when it comes to cupcakes I like them in all sizes - feel free to make these cupcakes using a standard cupcake pan, if you want a little more cake to icing ratio. Happy baking, and stay tuned for more upcoming Christmas recipes and trials and tribulations from the Hands' kitchen!
MINI CANDY CANE CUPCAKE RECIPE
recipe adapted from
Trophy Cupcakes via Martha Stewart
makes 28 - 30 mini cupcakes
notes: These cupcakes can be easily made in standard size. Add the crushed candy cane just before serving, or it will melt into the icing.
CAKE INGREDIENTS
1 cup + 3 tbsp white granulated sugar
1 cup all purpose flour
1/3 cup cocoa powder
3/4 tsp baking powder
3/4 tsp baking soda
1/2 tsp salt
1 egg
1/2 cup milk
1/4 cup vegetable oil
1 tsp pure vanilla extract
1/3 cup boiling water
FROSTING INGREDIENTS
1 cup unsalted butter, room temperature
2 1/2 cups icing sugar
3 tbsp milk
1 tsp peppermint extract
crushed candy canes
Preheat the oven to 350ºF. Line a mini muffin pan with cups.
Boil some water and set to the side.
Place a few small candy canes into a plastic bag. Roll over them with a rolling pin to break them into small pieces. You may need to bash them a bit to break up the large pieces. Set to the side.
In a large bowl, sift together the sugar, flour, cocoa powder, baking soda, baking powder, and salt.
In a medium size bowl, combine the egg, milk, vegetable oil, and vanilla with a hand blender until combined, or if you don't have one, combine with a wire whisk.
Add the dry ingredients to the wet and combine with a hand blender on low speed for 30 seconds. Increase the speed to medium and continue to beat for 2 minutes. This can also be done with a stand mixer using the paddle attachment.
Add the boiling water and stir.
Pour the batter into a wet measuring cup and then use to fill each muffin cup. Place the tray into the oven and bake for 18 - 20 minutes, or when a toothpick inserted comes out clean.
Remove the pan from the oven and let cool for 5 minutes. Remove the cupcakes and let cook on a wire rack.
In the bowl of a stand mixer, add the butter. Beat with the paddle attachment until light and fluffy - 3 minutes. Slowly add a 1/3 of icing sugar at a time, followed by 1 tbsp milk. The icing sugar should be fully incorporated before you add the next 1/3 cup. Add the peppermint extract. Continue to beat the icing until light and fluffy - 2 minutes.
Scoop the icing into a piping bag and ice the cupcakes - I used a Wilton 1M tip. Sprinkle with some crushed candy cane. Store in an airtight container for one week.

Spots, streaks, splashes, flour, and butter are just a few things obstructing my vision today, as I've been busy in my kitchen trying to perfect a dynamite sandwich cookie. With little time to breath, let alone clean my glasses, it's been nothing but cookies for days. I've been experimenting with chocolate, pumpkin, cinnamon, and ginger. I've made butter cream, marshmallow puff, and cream cheese icing, madly trying to create the ultimate sandwich/cookie combo. To be considered an ultimate sandwich cookie, the ratio needs to be perfect. A perfect ratio of sweetness, chewiness, and creaminess. To accomplish this, one needs to be sweeter than the other, the cookie or the filling. I prefer a sweet cookie with a milder frosting, more cheesy than sweet. The cookie needs to be soft and chewy with a slightly crisp outer layer, to balance out the creamy softness of the filling.
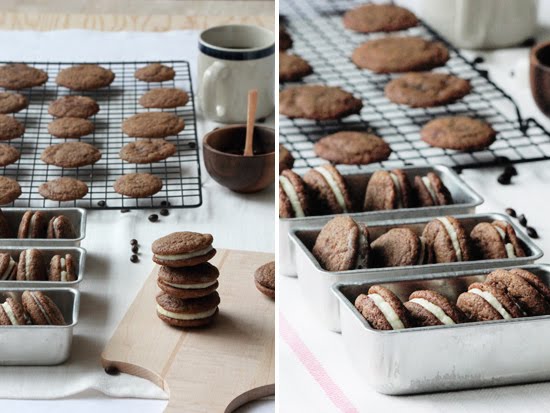
After much consideration and a hefty amount of sugar, I've settled on a spiced ginger cookie with a cream cheese filling. This recipe surely takes home the cake, or I suppose the cookie in this situation. My apartment, clothes, dog, etc. have a lingering aroma of spiced ginger and molasses, and I am extremely pleased with this situation. There are sticky cream cheese finger prints everywhere, obviously something I am less happy about. I've just poured myself a cup of coffee in my new french press, and am about to enjoy a wonderful sugar sandwich. Life just doesn't get any better than this.
GINGER SANDWICH COOKIES WITH CREAM CHEESE FILLING
makes 15 - 20 sandwiches
recipe adapted from
Tasha DeSerio via Fine Cooking
INGREDIENTS
2 cups + 4 tbsp cake flour
4 tsp ground ginger
2 tsp cinnamon
1/2 tsp baking soda
1/2 tsp salt
3/4 cup butter, room temperature
1/2 cup brown sugar
1/2 cup white granulated sugar + 1/2 cup for rolling
1/4 cup molasses
1 large egg
2 tsp vanilla extract
ICING INGREDIENTS
8 oz cream cheese, room temperature
5 tbsp butter, softened
1/2 cup powdered sugar
1 tsp vanilla
In a large bowl, combine the flour, ginger, cinnamon, baking soda, and salt.
In a large bowl, or the bowl of a stand mixer, beat the butter and both sugars until light and fluffy, scraping down the sides as necessary. Add the molasses, egg, and vanilla and mix until incorporated. Slowly add the flour until fully incorporated. Cover the bowl with plastic wrap and place in the fridge for 30 minutes.
Preheat the oven to 350ºF.
Remove the dough from the fridge. Place 1/2 cup of granulated sugar into a small bowl. Scoop a little less than a tbsp of dough into you hands and roll into a ball. Dip into the sugar to coat. Place onto the baking sheet and space 2 inches apart. Once you have placed all the cookies onto the baking sheet, coat the bottom of a drinking glass with butter. Dip the glass into the sugar, and tap lightly the top of the cookie.
Bake for 10 - 13 minutes (smaller cookies need less time), until the cookies have begun to harden on the outside, but still feel soft on the inside. They will appear as though they are undercooked, but they are probably just right.
Cool completely on a wire wrack.
While the cookies are cooling, beat the cream cheese, butter, powdered sugar, and vanilla until creamy.
Once the cookies have cooled, spread some of the cream cheese icing on the flat side of a cookie. Place another cookie on top forming a sandwich. Refrigerate for up to a week.