Making yogurt from scratch first peaked my interest during college, during a second-year microbiology class. It has since been on my list of culinary-to-dos. This class was taught by, lets call him Prof L, for confidential reasons. I often saw Prof. L walking around campus. I would give him the old nod, and we would go about our business. Frequently, I would run into him at the gym, him running on the treadmill wearing his Birkenstocks, and the same professional attire he was regularly spotted wearing in the lab – beige shorts, and a tattered old Grateful Dead shirt. Prof. L struck me as the rebellious type, with his long silver hair, and an attitude suggestive of protesting and free speech. He was French and he was enthusiastic.
During the summer months, Prof L. would head to the Costa Rican Rainforest to study yeast biodiversity in its natural habitat - quite fascinating stuff. Prof. L would spend months in the forest, collecting samples, taking notes. He basically had my dream job, until I later came to realize - during an adventure in Borneo, that the Rainforest is really wet and dewy, and there are a lot of creepy crawly bugs. Although the Discovery Channel does a good job at depicting the Rainforest as a majestic and serene place, actually being in the rain forest is a lot different than viewing it on a television. When I am in the Rainforest, I am basically a heart attack waiting to happen, walking very stiff, jumping a thousand feet when I hear a noise, or see a beetle the size of my hand - naturally.
During my ‘discover-thy-self’ phase of life, I had a lot of ideas about the person I wanted to be - yeast studying jungle scientist, international peacekeeper, foreign aid worker. As I got older, I learned more about myself, my likes and dislikes, and I really do like modern conveniences, running water, toilet paper, clean sheets. So basically, I am not cut out for jungle work.
In college, I majored in nutrition, with the hopes of one day working abroad. I was really interested in nutrition education, and food fortification, and had a keen desire for travel. I had always envisioned myself living in a small rural hut, with a few basic necessities, doing good, helping people. During my dietetic internship, I took a rotation at World Vision. I was involved in some pretty interesting projects, and it all seemed very appealing to me at the time. It wasn’t until I graduated college, and actually spent some time abroad that I realized that ‘international relations’ was not the path for me. Through my own experiences and the experiences of others, I felt and saw the frustrations that came with that particular career. Projects failing, often for very frustrating reasons – politics, war. Emotionally, I knew that I couldn’t commit to this kind of life. I really wanted to be that person that I had envisioned, but when it came down to it, I needed to be true to myself and embrace the person that I am, not this ideal picture I had painted in my head.

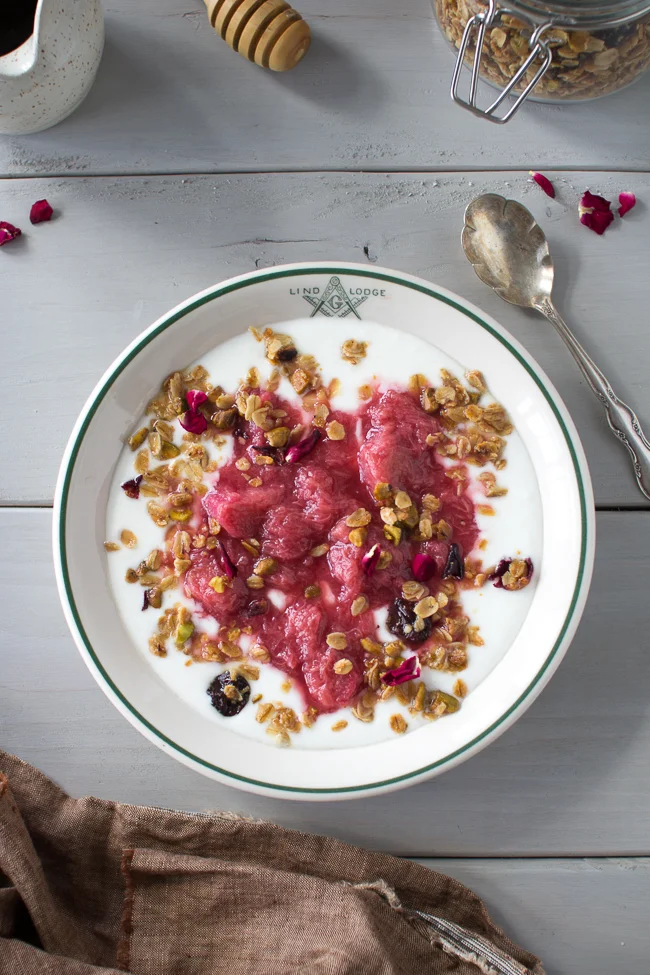
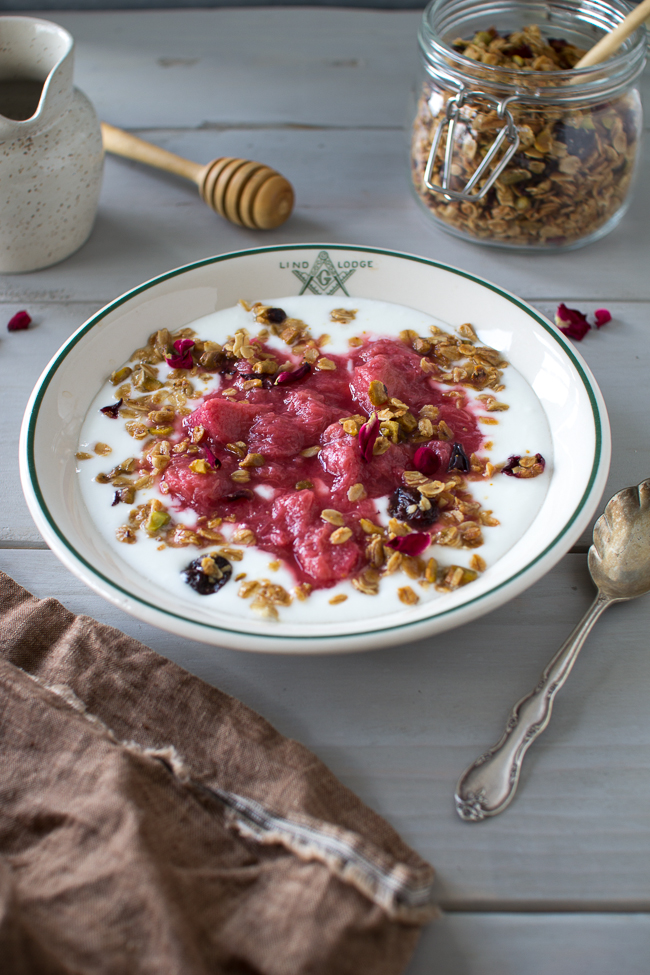
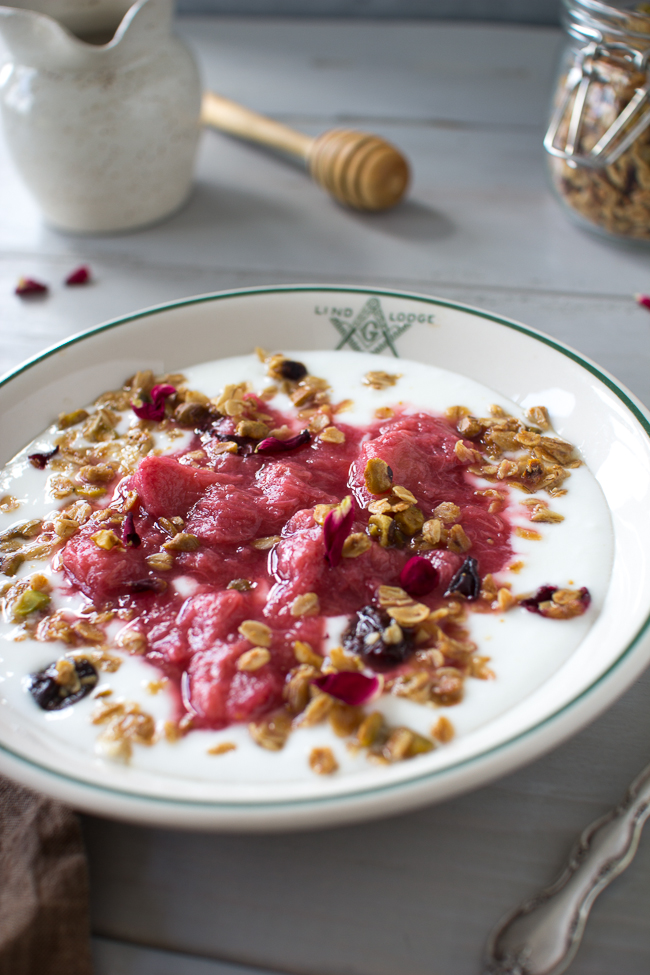
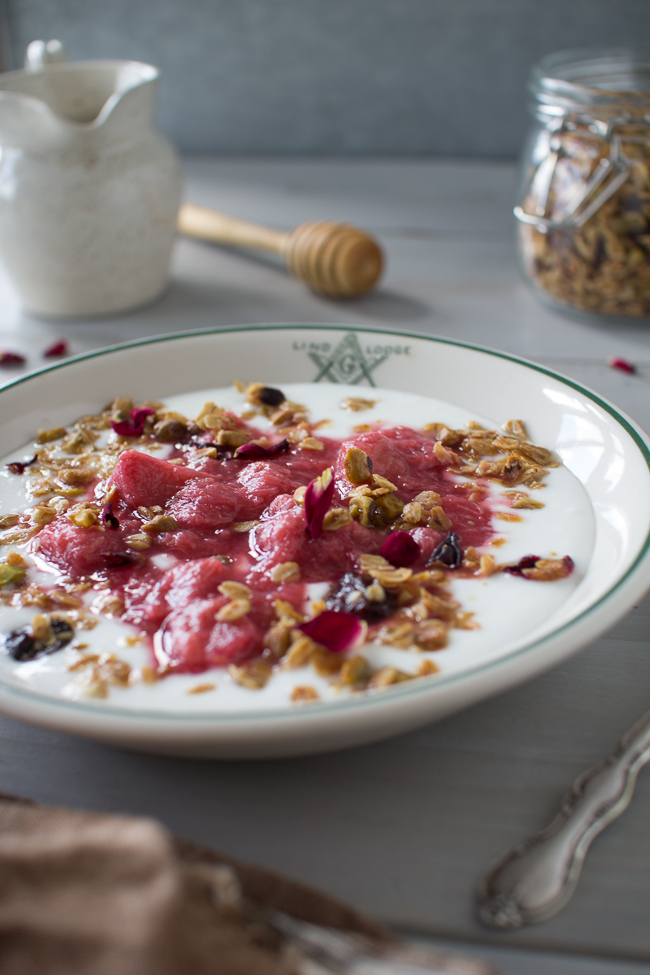
And now, here I am, still trying to figure things out. In the meantime, I might as well make a dent in my list of culinary-to-dos, don’t you think? Because two things are for sure, I love food and I’m always keen on making anything that involves the help from either yeast or bacteria. I’ve taken a couple of stabs at cheese making, and because that was pretty amazing, I thought that yogurt seemed like a super exciting transition. I was actually inspired by brunch last Sat, at Sitka and Spruce, here in Seattle. Last weekend was full of gluttony, like most weekends. We ate and drank and then ate some more. Amongst all of the destinations we visited, Sitka and Spruce had an item on their menu that really sparked my interest – rose granola, stewed rhubarb, and fresh homemade yogurt. A classier version of my standard - Fage cherry pomegranate yogurt, with a handful of Special K Red Berries thrown in for crunch.

Making yogurt is super fun, and not time consuming at all, which I had originally thought. Finding a place to incubate your yogurt - a cooler filled with warm water, or a yogurt maker, is the most challenging part of yogurt making. Some people suggest heating the oven to the 'warm mode' and then incubating the yogurt in it, but that basically means that you need to be home for 4 - 7 hours to make sure that your house doesn't burn down, and then this yogurt business becomes way more time consuming than anticipated. Owning a kitchen thermometer will be useful to regulate the temp of the milk and the water in the cooler. You can also use the thermometer it to make all sorts of candy, which sounds like heaven.
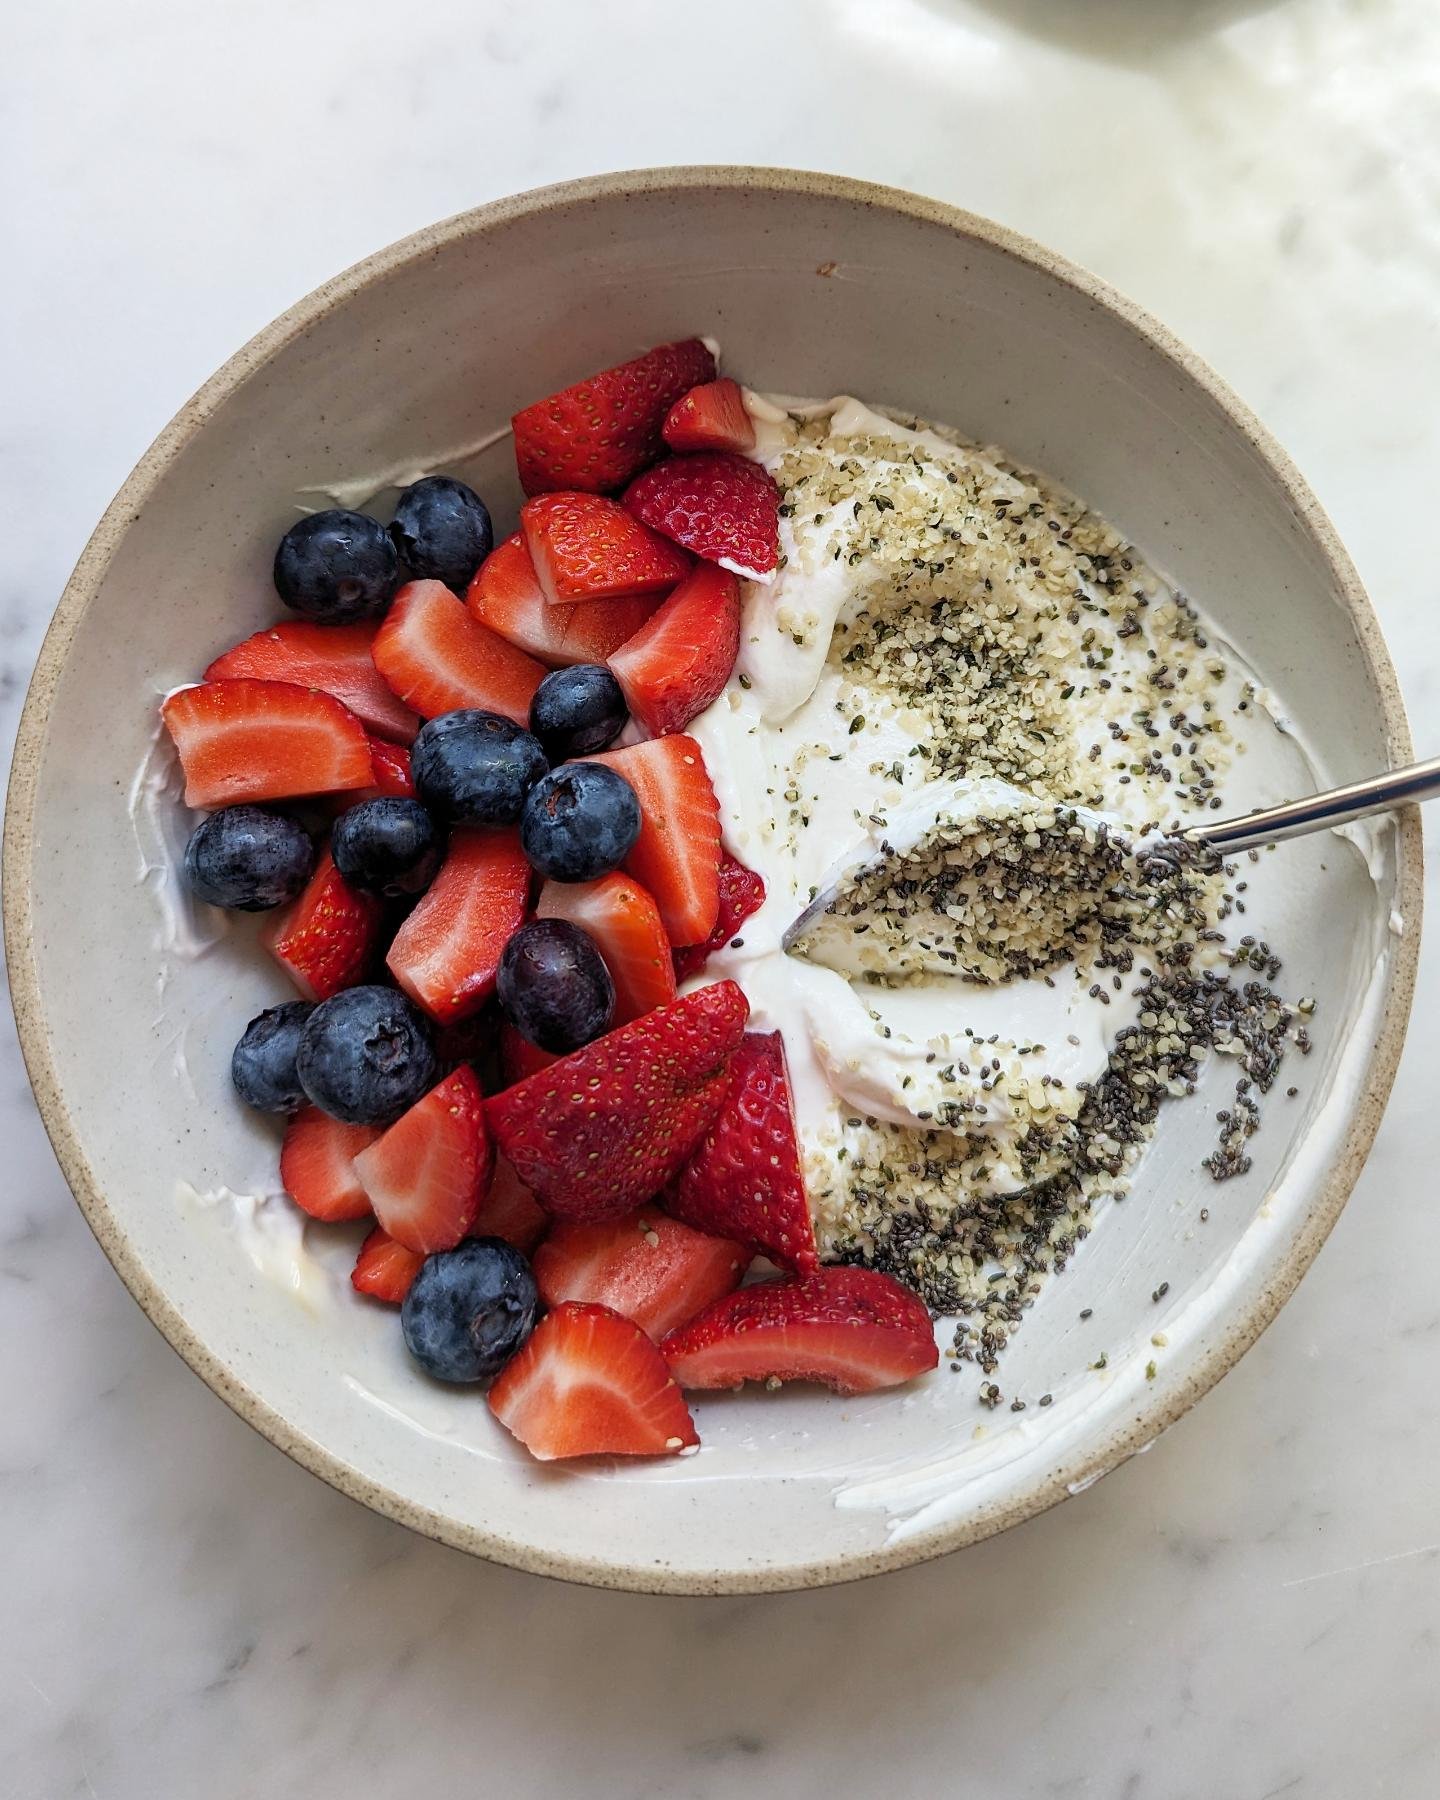
To make yogurt, all you really need to do is heat 1 quart of milk to 185ºF to kill any harmful bacteria, and then cool it to 110ºF. Then add in 2 tbsp of yogurt, containing all of those awesome bacteria, and then mix. Pour the milk into sealable jars, place them into an area that will maintain its temp of 110ºF for 4 - 7 hours. The bacteria from the yogurt, will eat the lactose sugars in the milk. As a by-product, the bacteria produces lactic acid, which acts on the milk proteins to give yogurt its texture and tangy taste. The longer you allow the bacteria to ferment the yogurt, the more sour it will become.
Voila, yogurt.
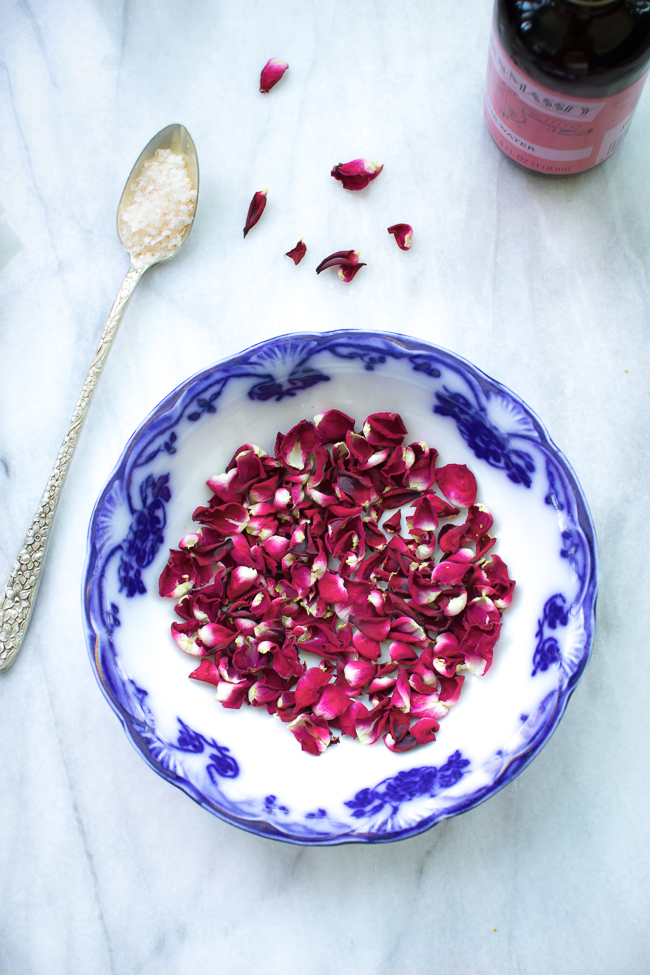
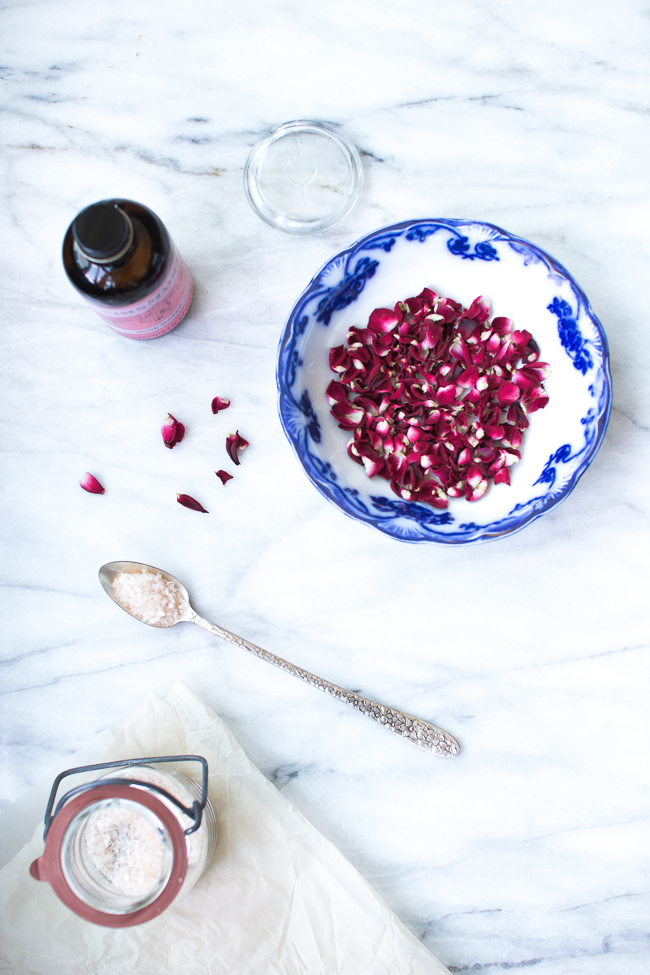
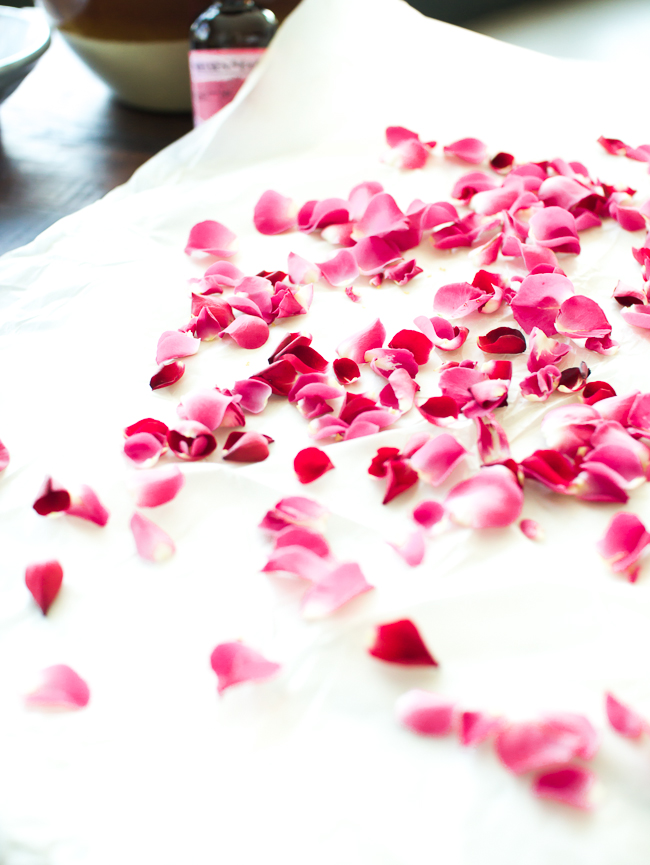
I decided to step it up a few notches with this granola. I adapted it slightly from Heidi's rose petal granola recipe. It is honestly, so delicious, and probably one of the best tasting granola recipes I've had to date. The rose petals add such a pretty color, and they were super fun to dry. Rose water is basically the most amazing thing, and I am confused why it has taken me this long to use. I've been adding a few drops to the bath in the evening, so I am now feeling as though the purchase was completely justified.
I saw some bright red rhubarb at the market and got pretty excited, probably because I have been waiting for it for the past couple of months, and now it is here, as beautiful as ever. I love the color of rhubarb once it's been stewed, the beautiful shade of pink. I am super pleased with how this dish turned out. I am basically eating the granola and rose petals, standing in the kitchen, right out of the bag. Totally classy - not so classy.
PISTACHIO ROSE GRANOLA
adapted from
makes 6 cups
notes: whenever I see a bouquet of miniature roses at the shop, I'll pick up a few dozen and dry them in bulk batch. Then I'll add them to granola, cookies, salads, or sprinkle a few in the bath with some rose water.
INGREDIENTS
10 - 12 tiny roses
4 cups old fashioned rolled oats
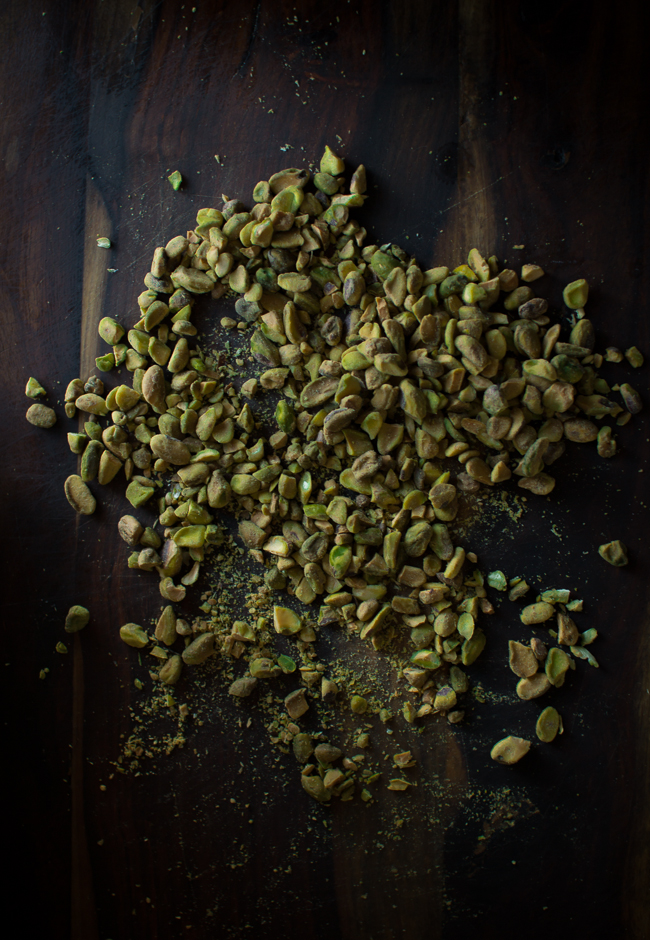
1 cup pistachios, chopped
3/4 cup of dried cherries
1/2 tsp salt
1/8 tsp ground black pepper
1/2 cup butter
1/2 cup honey
1/2 tsp rose water
Remove the petals from the roses and scatter then onto a baking sheet. Place the sheet outside in the direct sun for 3 hours to dry (
note - the ends of the rose petals will curl slightly
). Alternatively, if weather does not permit, you can air dry the rose petals indoors, in a cool dark area for 2 - 3 days, or in the oven for 30 minutes at 250ºF. Once the petals have dried, place them into an airtight container for later use.
Preheat the oven to 300ºF, and rearrange the wracks so that they are in the top and bottom thirds of the oven. In a large bowl, combine the dried rose petals, oats, pistachios, dried cherries, salt, and pepper. Heat the butter in the microwave or on the stove top. Dissolve the honey into the butter, and then stir in the rose water. Pour the wet into the dry and combine.
Spread the granola onto two baking sheets. Place into the oven and bake for 30 - 40 minutes, rotating the pans from top to bottom half way through baking. Once the granola appears golden brown, remove from the oven to cool. If you prefer your granola in small chunks, then press flat with a spatula once you remove it from the oven. Once cooled, store in an airtight container for up to a month.
HOMEMADE YOGURT
makes 4 cups
notes: yogurt can be made with skim, 2%, or full fat milk. Full fat milk will provide a thicker texture and creamier taste than skim or 2%. The longer you incubate the yogurt, the more sour it will become. Six hours tends to produce my ideal yogurt, while 9 hours will make a very sour yogurt. Experiment, with times. Start at 6 hours, and then adjust based on your preferences. Anywhere between 4 - 7 hours is acceptable. When you are getting started, choose your favorite commercial plain yogurt to use as a starter. If you are pleased with your batch, save a couple of tbsp's to use for the next batch. Remember that regular yogurt is much thinner in consistency than Greek yogurt. To make Greek yogurt, strain the yogurt using a cheesecloth over a bowl for 2 hours in the fridge.
INGREDIENTS
1 quart of full fat milk
2 tbsp plain yogurt
Prior to making yogurt, you will need to gather the following equipment: 1 medium saucepan, kitchen thermometer (one that will read 110-185ºF), wire whisk, 4-5 small mason jars, large spoon. Make sure all of your equipment is clean and sterilized with boiling water.
Before you begin to make the yogurt, create an ice bath by filling the kitchen sink three inches high, with cold water and ice cubes.
Place the milk into the saucepan. Heat on medium until it reaches 185ºF, stirring constantly to prevent burning. Remove the saucepan from the stove and place it into the ice bath. Cool the milk until it reaches 110ºF. Add 2 tbsp of plain yogurt to the milk. Stir with a wire whisk to ensure that the bacteria is evenly distributed. Pour the milk into the mason jars 1/2 inch from the top. Seal with the lid.
You will need to incubate the yogurt for 6 - 7 hours at 110ºF for the bacteria to do its magic. This can be achieved by filling a cooler with 110ºF water and placing the jars into the cooler, but do not immerse. One inch from the top of the jar, so that your reduce the risk of water leaking through the lids. You will need to check the water after a few hours to ensure that it has stayed at 110ºF. I have also heard of people heating their oven to the warm setting, and then placing the jars in the oven to incubate. The following
has a nice summary of various incubation methods.
Once the yogurt has been sitting at 110ºF for 6-7 hours, place the jars into the freezer for 1 hour. Transfer the yogurt to the fridge, and cool for 4 -5 hours before serving. Can be kept in the fridge for 1 week. Stir before serving.
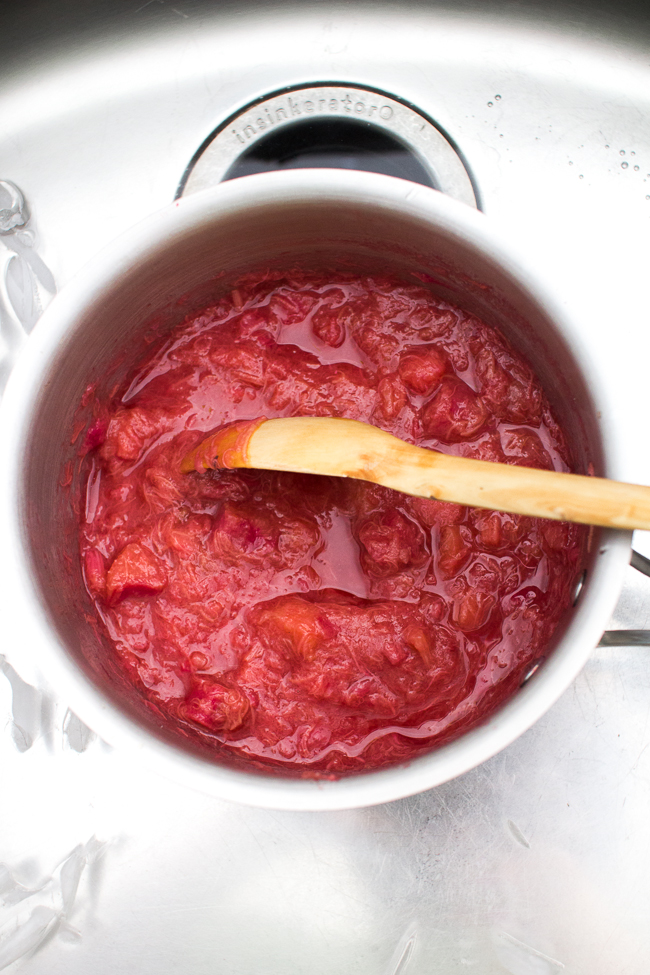
STEWED VANILLA BEAN RHUBARB
makes 3 cups
INGREDIENTS
3 cups rhubarb, chopped
1 vanilla bean
1/2 cup white granulated sugar
1/4 cup water
Place the chopped rhubarb in a medium saucepan with the whole vanilla bean, sugar, and water. Bring to a boil, then reduce heat to low. Cover with a lid, and simmer until the rhubarb is soft, approximately 5 minutes. Remove the pot from the stove and transfer the rhubarb to a dish to let cool. Remove the vanilla bean and discard. If you are planning to eat the rhubarb immediately, another option would be to remove the pot from the stove and then place directly into an ice bath. This should cool the rhubarb in less than 10 minutes. Stewed rhubarb can be kept in an airtight container in the fridge for a couple of days.